Convert Tub to Walk in Tub: Steps, Costs and Plumbing
Convert Tub to Walk in Tub: follow the steps, plumbing checks and cost ranges, and learn when a curbless shower fits better.
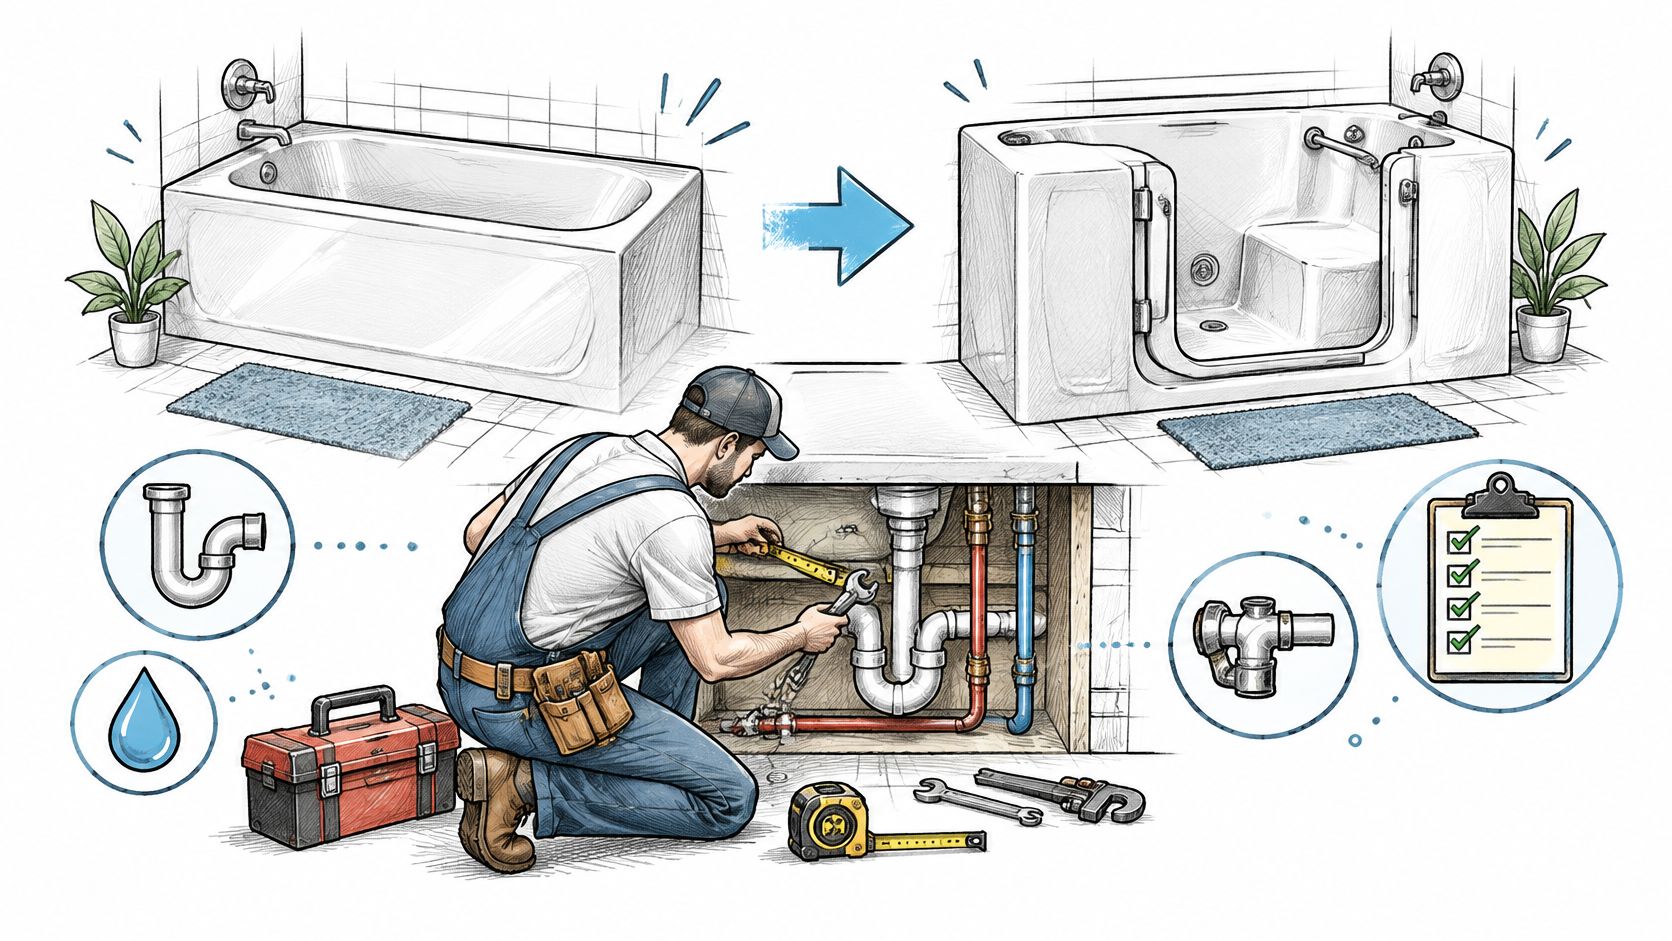
The bathtub that used to be a quick, ordinary part of the day can become the hardest step in the house. If getting in or out now feels risky, a walk-in tub may help, but choosing one by its advertised door height alone can leave the underlying problem untouched: whether the person can enter, sit, reach the controls, bathe, and get back out safely.
AARP's 2024 Home and Community Preferences Survey found that 43% of older adults expected to modify their homes to remain there safely as they aged, and bathroom changes were the most frequently named accessibility improvement among those planning changes, at 72%. A tub conversion can be part of that work, but it should fit a wider safety plan, not substitute for one. AARP's aging-in-place survey coverage offers useful context for why homeowners are taking a closer look at bathroom access.
How to Convert Your Tub, Step by Step
A walk-in tub often fits the existing tub footprint, but the conversion is really a plumbing, framing, and waterproofing job with a tub attached.
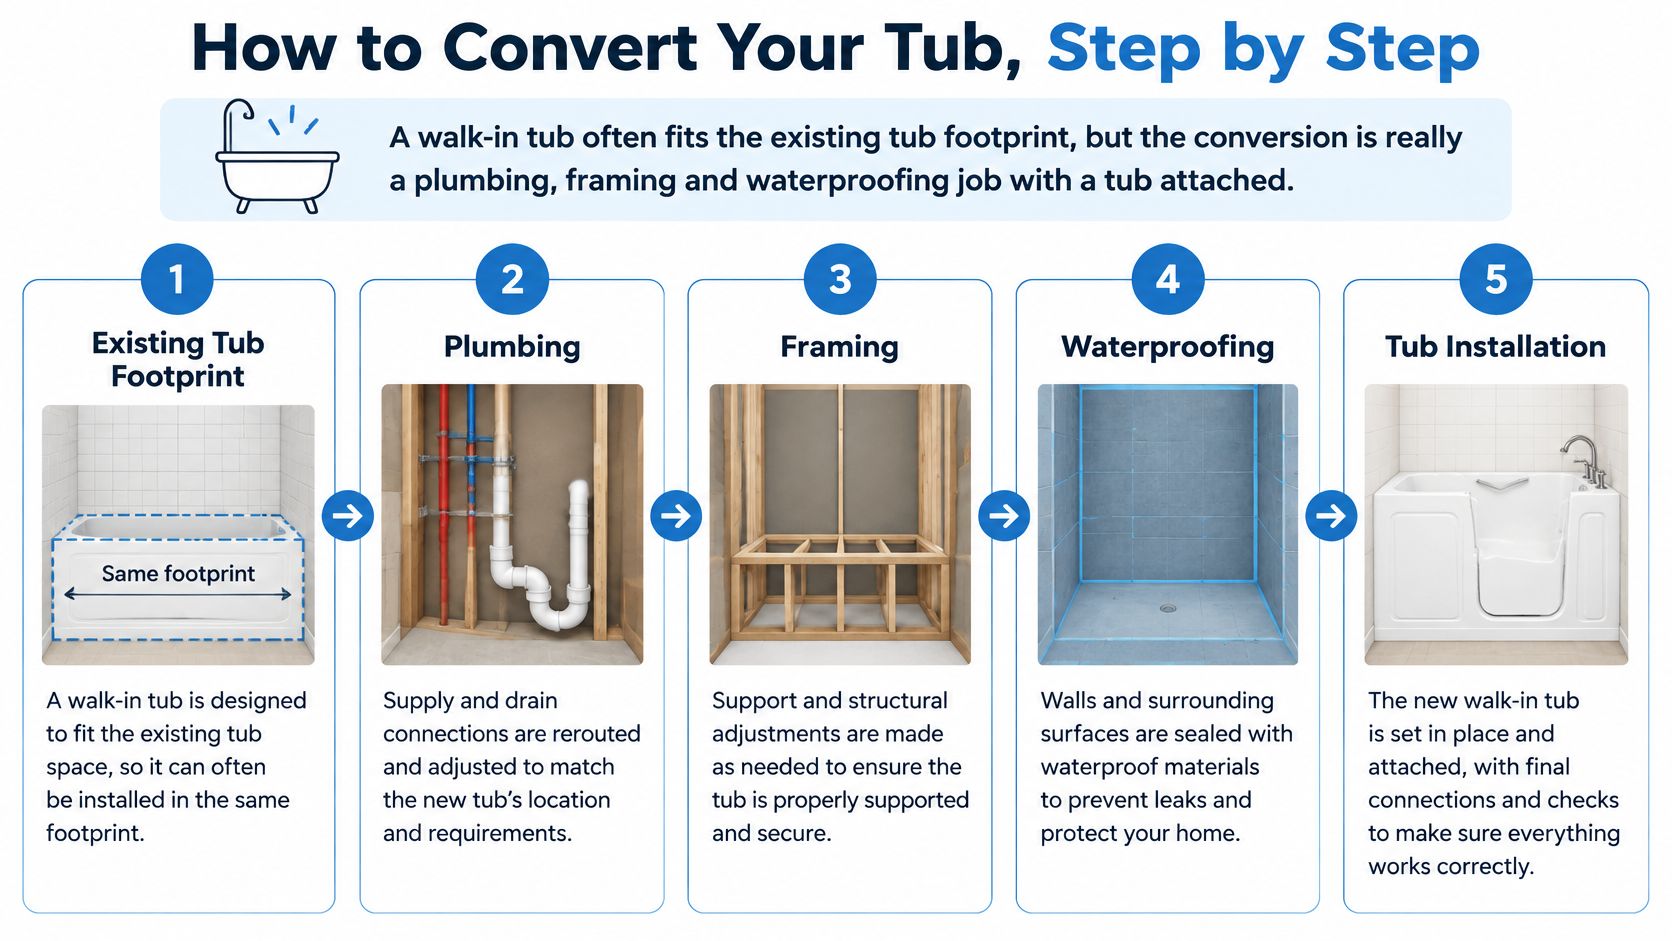
Survey the bathroom before demolition. Check the drain location, water-supply routing, wall framing, subfloor condition, electrical needs, and clear floor area. Those conditions determine whether the chosen tub fits and what must change to install it. A tub that fits the alcove on paper may still need a drain moved, a weak floor repaired, or room made for the door to swing.
For a shower conversion, the U.S. Access Board's accessible bathing guidance sets out transfer-shower dimensions and grab-bar placement. Treat those measurements as a design reference, not a promise that a particular tub will work in your room. Measure finished clearances after accounting for wallboard, waterproofing, tile, trim, and the unit's door swing.
Set the layout and fixture schedule. Decide where the controls, handheld shower, seat, and grab bars belong before closing the walls. A seated user shouldn't have to reach through a spray of hot water to turn on the shower. Think through the path from the bathroom doorway to the tub, too, especially if a walker or caregiver needs access.
Get required approvals. Confirm local permit requirements before work starts. Moving a drain can mean opening the subfloor and may require plumbing approval, so don't leave that discovery until the old tub is already out.
Remove the old tub and inspect what's behind it. Once the alcove is open, check the framing and subfloor for moisture damage or rot. Repairing a soft floor now is much less disruptive than installing a new unit over a problem that later causes movement or leaks.
Modify the plumbing. Align the drain and trap with the tub's outlet, check that drainage will work properly, and update the supply connections and valve as needed. Don't assume the old drain lines up with the new unit just because the tubs occupy similar spaces.
Install waterproofing and structural backing. Add blocking where grab bars will go before the walls are waterproofed. The Access Board's guidance addresses backing and grab-bar placement; in a real bathroom, the installer must coordinate those details with the user's reach and the unit's layout.
Finish the walls and install fittings. Close the walls, complete the tile or surround, and anchor grab bars into framing, not tile or cement board alone. Plan the controls and handheld shower so they're usable from the seat.
Test before handover. Fill and drain the tub, check the door seal, run the shower, and inspect all connections for leaks. Confirm the drain clears properly before the finished work is signed off.
The expensive mistake is skipping the survey and finding a drain offset after demolition. Take this sequence to your first estimate as a checklist, and compare proposals for the same scope. For help planning the room's overall layout and finishes, see these bathroom remodel design ideas.
Plumbing and Water Pressure to Plan Early
In the United States, showerheads have a 2.5-gallon-per-minute maximum flow, while EPA WaterSense-labeled models are certified at no more than 2.0 gallons per minute and must still meet spray-force and coverage criteria. WaterSense tests showerheads at 20, 45, and 80 psi, so the showerhead, handheld, diverter, and valve need to work across the home's actual pressure range. The EPA's showerhead and diverter guidance explains why hardware selection belongs in the plumbing design, not at the end of finish shopping.
A walk-in tub may have been selected for bathing, but a showerhead and handheld still need to perform reliably if the unit will also be used for showering. Tub plumbing was designed for a different fixture arrangement. The existing valve, riser, or drain may need to change to support the new setup.
Commission the water system
Before calling the job complete, test it under realistic conditions:
- Measure static pressure at the bathroom supply.
- Run the shower and a nearby fixture together to see whether flow changes.
- Watch the water temperature for swings while both fixtures run.
- Check drainage at the maximum intended flow and look for ponding.
A low-flow head won't fix a poorly sized or partly blocked riser. Likewise, combining multiple outlets can overwhelm the supply or drain, even if each outlet works well on its own. Place controls near the entry when practical, use a handheld shower on an adjustable bar, and check that the hose and mounting height work from the seated position.
Assign the shower hardware during design, not when the tile has already been chosen.
What a Walk-In Tub Conversion Really Costs
| Scope | Cost reference | What it covers | Disruption |
|---|---|---|---|
| Unit only | Listed walk-in tubs commonly start around $3,000–$5,000 before installation | Tub, door, and basic fittings; no installation or site work | No construction included; installation still has to be scheduled |
| Standard replacement | The unit price above, with installation, drain connection, and waterproofing priced separately | Swap within the existing bathroom footprint | Bathroom unusable while work is underway |
| Full remodel with accessibility work | General bathroom remodel medians of $13,000 for a typical remodel and $22,000 for a major one, used as reference points | Unit plus wall repair, flooring, grab-bar backing, electrical, and finish work | Phased plan; primary bath may be out of use for a long stretch |
The National Council on Aging and Houzz cost references summarized for remodelers show why a unit price and a renovation budget aren't interchangeable. The National Council on Aging says listed walk-in tubs commonly start around $3,000–$5,000 before installation, and that insurance typically doesn't cover them. Houzz's 2025 bathroom data puts median spending at $13,000 for a bathroom remodel and $22,000 for a major remodel. Those medians describe ordinary remodels, so treat them as a sanity check on a full-gut quote rather than a price tag for accessibility work.
What adds to the invoice
Demolition and disposal come first. Then the contractor may need to correct drain alignment, adjust plumbing, or check whether a fast-draining model can empty through the existing drain. Powered seats, pumps, or heated features can require electrical work. Waterproofing, wall repair, flooring, permits, and inspection turn a simple-sounding replacement into a larger project.
The hidden site work is where conversion budgets go wrong. If the plan calls for grab bars positioned so a helper can assist from outside the unit, the walls need solid blocking before they get closed up and retiled. Skip it, and the household pays for that wall twice: once to open it, once to repair it.
The disruption is part of the cost, too. Demolition, rough plumbing, waterproofing, inspection, and finish work can leave a household without its main bathroom while the job is underway. If it's the home's only bath, ask for a phased schedule before agreeing to a start date.
Ask for the scope in writing: separate the unit, demolition, plumbing, electrical, waterproofing, flooring, permits, inspection, disposal, and finish work, with a timeline for each phase.
A complimentary estimate for labor and materials should break out each of those items instead of burying them in one total. Use this bathroom remodel estimate guide to prepare your questions. An advertised starting price on the tub says almost nothing about the invoice. The drain, the walls, and the schedule do.
Walk-In Tub or Curbless Shower by Need
| Need | Walk-in tub fits when | Curbless or low-curb shower fits when |
|---|---|---|
| Bathing habit | The user wants to soak in warm water | The user mainly showers |
| Transfer method | The user can step over a door sill and sit down unaided | The user walks, uses a walker, or rolls in without a step |
| Caregiver access | The helper only needs to assist from outside the unit | The helper must stand inside beside the user |
| Bathroom size | The existing tub footprint is the only space available | The room has open floor for a slope and clear turning space |
| Emergency egress | The door opens clearly and the user can exit quickly | The open entry allows fast exit without a door |
A walk-in tub isn't automatically the safest or most usable choice. The true test is the whole transfer path: entry, seating, turning, reaching the controls, standing up, and getting out after bathing. A low entry threshold can still leave a user stepping over a wet interior sill, struggling to reach controls from the seat, or unable to make room for a caregiver.
Homeowners planning for future needs often combine modifications rather than relying on one fixture. In a 2025 Houzz study, they selected grab bars at 61%, nonslip flooring at 55%, low-curb showers at 52%, and curbless showers at 28%. A systematic review also found bathroom safety work commonly combines threshold removal, doorway widening, grab bars, and nonslip surfaces. The 2025 Houzz bathroom trends study offers a useful snapshot of how homeowners are approaching these changes.
Check the transfer, not the brochure
Stand where the user will sit and test whether they can reach the controls. Check how a helper would get close enough to assist, whether the bathroom door blocks access, and whether the user can exit quickly in an emergency. A tub door's advertised entry height doesn't answer those questions.
If the user can't sit down and rise independently, a curbless shower with a bench may be a better fit. If soaking is part of the regular routine, keep the tub in consideration, but assess the room and transfer path before choosing equipment. This walk-in shower conversion overview can help you compare the alternatives.
Fixing Leaks, Slow Drains and Loose Grab Bars
One of the first problems you may notice is water pooling outside the tub door. A slow or gurgling drain, a grab bar that shifts under pressure, a temperature swing mid-shower, cracked caulk, or a water heater that runs out during a bath can also point to installation or planning problems.
| Symptom | Likely cause | Fix |
|---|---|---|
| Water pools outside the door | Door seal not seated or threshold set too low | Re-seat the seal, adjust the door, and run a full-fill test before tiling |
| Drain fills slowly or gurgles | Drain undersized or trap misaligned | Check drain capacity and slope with the unit installed |
| Grab bar moves under load | Anchored to tile or cement board, not framing | Remove it, add blocking, and reinstall it into framing |
| Shower temperature swings | Valve isn't pressure-balancing or thermostatic | Replace it with a balancing valve and verify performance across the pressure range |
| Caulk cracks at the tub wall | Wall movement or poor sealing before caulk cured | Re-caulk after the full cure time and check for wall movement |
| Water heater runs out mid-bath | Heater too small for the fill volume | Check heater capacity, reduce fill volume, or plan a heater upgrade |
Some repairs may take a single service visit, such as reseating a door seal or re-caulking a joint after confirming the surfaces are stable. A loose grab bar may require opening the wall to add blocking, while a faulty valve can mean reopening the finished wall. The fix depends on what failed, so don't treat every leak as a bead-of-caulk problem.
Test the tub with a full fill before tile goes up. That's the time to catch leaks, confirm drainage, and adjust the seal without undoing finished surfaces. Keep photos of the plumbing and grab-bar blocking before the walls close, and ask for the waterproofing warranty to be listed separately from the tub warranty.
If a repair involves the tub walls or floor, call the installer before attempting it yourself.
Book Your Site Assessment Before You Order
Measure the bathroom before you choose the tub. A product can look ideal in a catalog and still fail the practical test once the drain, door swing, transfer space, and caregiver access are accounted for.
Bring a copy of the eight-step installation checklist and mark each item confirmed, unknown, or needs a contractor. Include the clear floor area and planned grab-bar locations, measured after wallboard, waterproofing, tile, trim, and door swing are considered. Photos of the drain, supply routing, and exposed framing can help the contractor understand what's behind the finish.
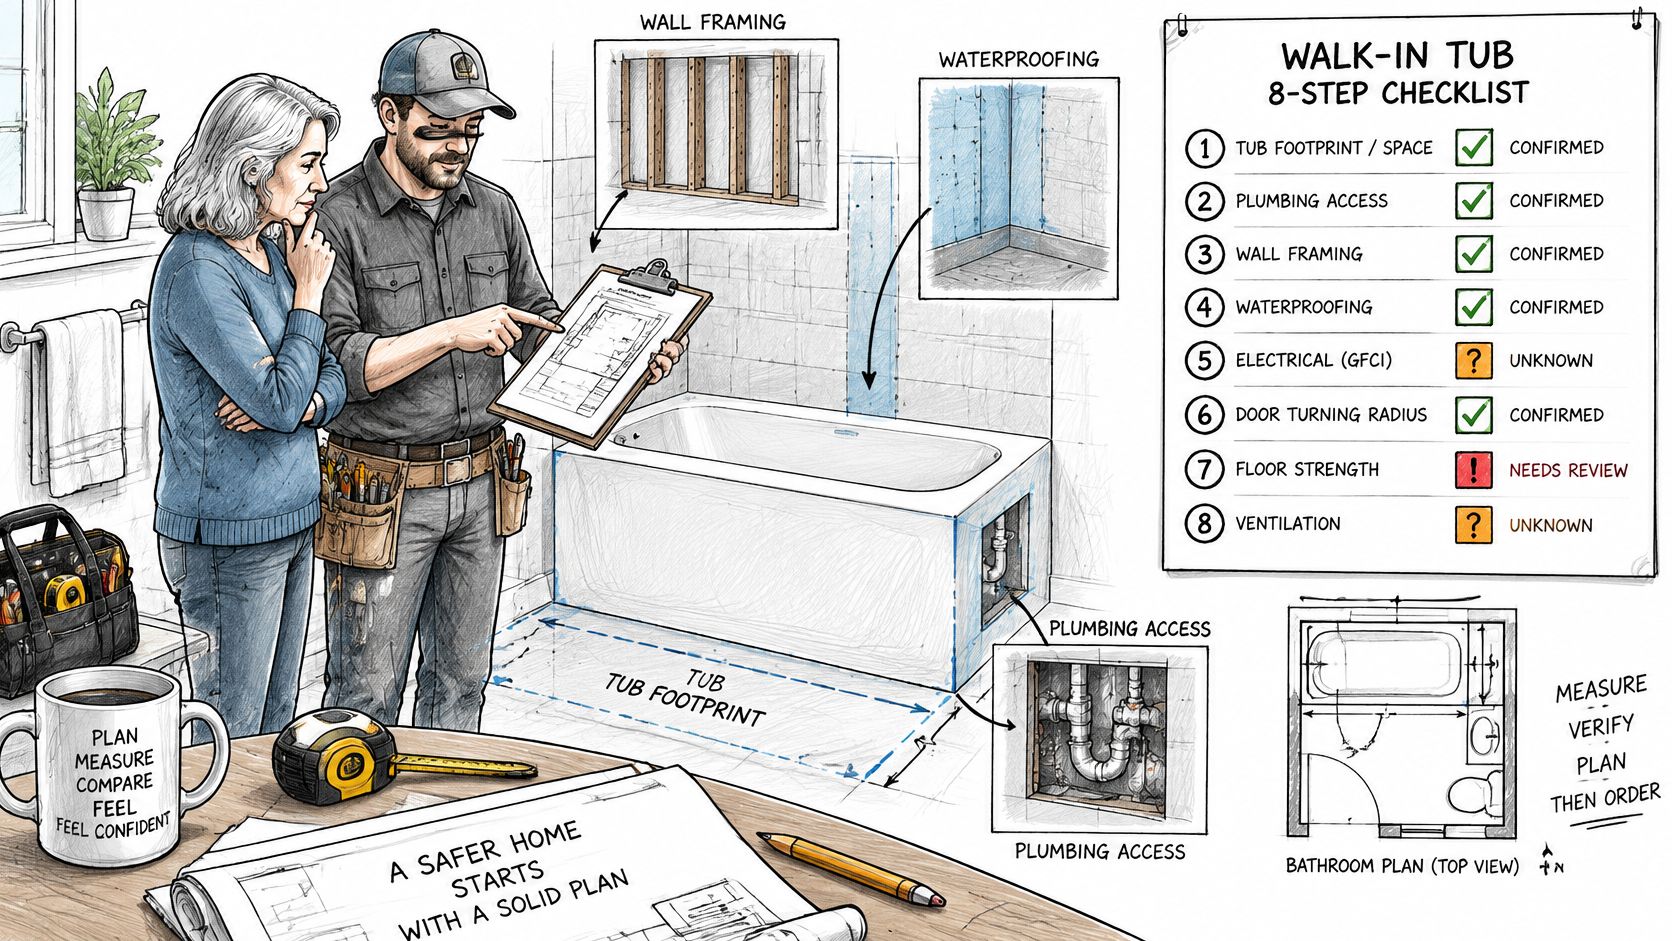
Bring answers to the transfer questions, too. How does the user enter, sit, turn, reach the controls, stand, and exit in an emergency? Does a helper need to stand beside the user, or can they assist from outside the unit? These answers help determine whether a walk-in tub is suitable or whether a shower layout would work better.
Get a usable written scope
A useful site assessment should list plumbing, drain capacity, waterproofing, grab-bar backing, electrical work, and finish work as separate items with a price for each. If the home has only one bathroom, ask for a phased timeline showing when it will be out of service and when it will be usable again.
Epic Remodeling offers a free in-home consultation, which can be booked through its contact form or by calling. A qualified general contractor can review the site and help plan the project; the company also offers a complimentary estimate for labor and materials. Epic Remodeling is licensed and insured, with CSLB #1095347. Ask for license and insurance details in writing, then verify them with your state licensing board before signing.
Book the consultation before ordering the tub, and bring your completed checklist so the assessment can focus on the actual bathroom and the person who will use it.
Epic Remodeling offers a free in-home consultation and a complimentary estimate for labor and materials, so you can assess the plumbing, access, and full project scope before choosing a walk-in tub. Visit Epic Remodeling to request a consultation and bring your bathroom checklist to the visit.