Room Addition Cost Calculator: Inputs and Sample Costs
Learn how a room addition cost calculator works, which inputs matter, and how to run sample estimates for Orange County and Los Angeles projects.
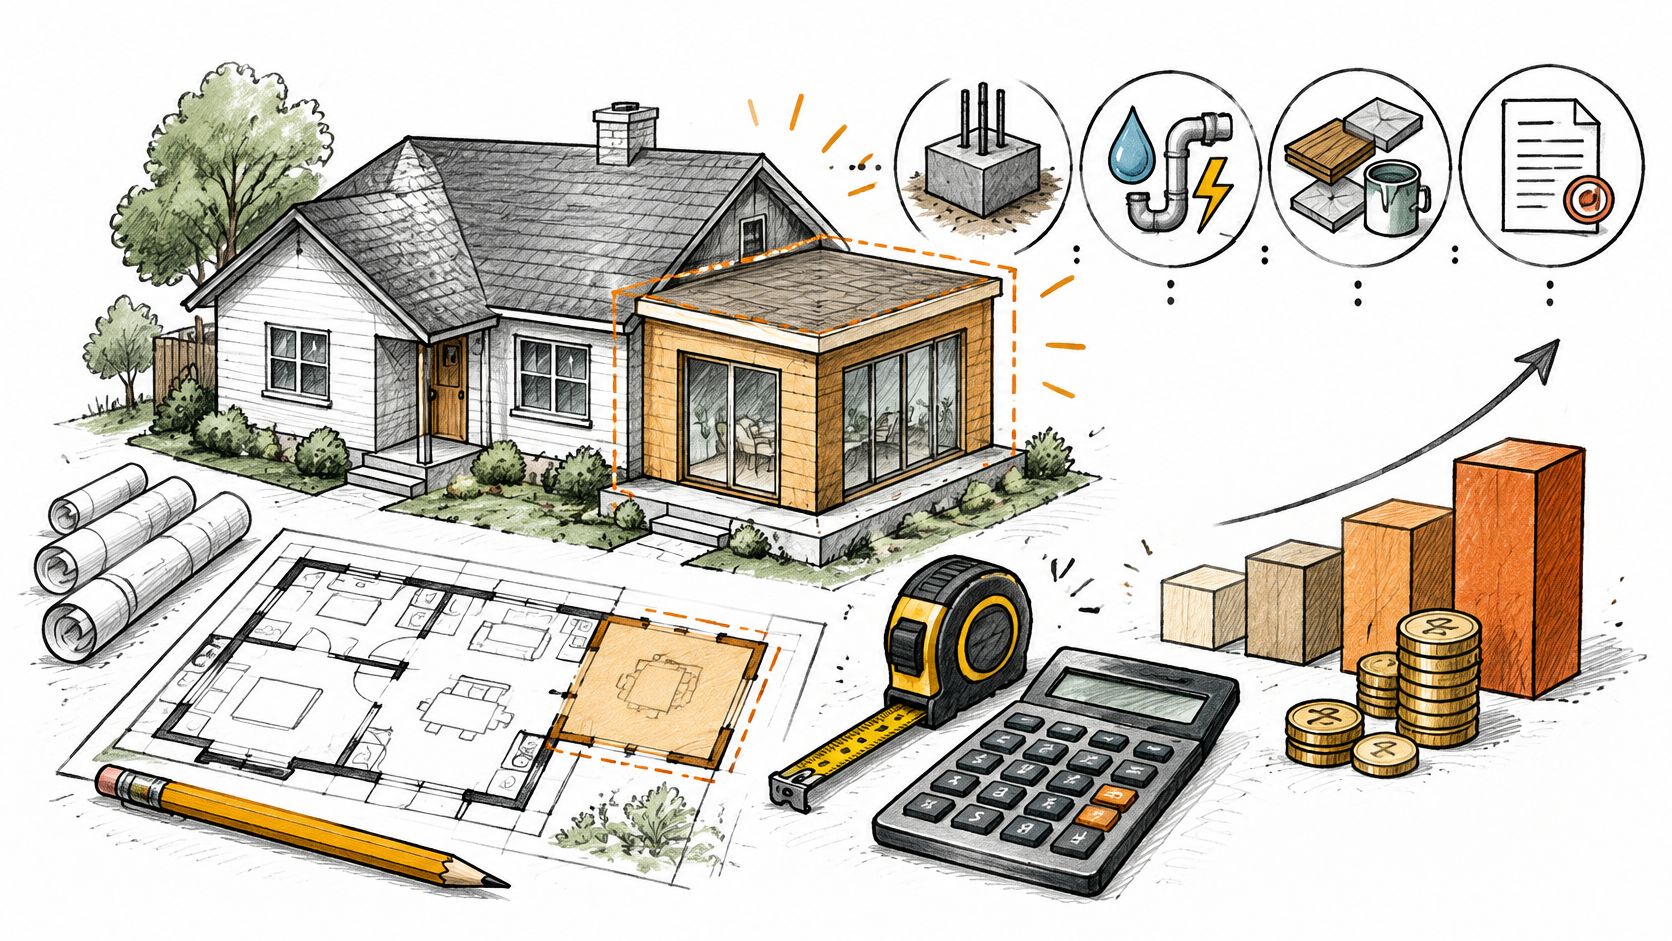
A room addition cost calculator using a national benchmark of roughly $162 per square foot puts a 200-square-foot addition at about $32,400 and a 400-square-foot addition at about $64,800. Those figures are starting points, not quotes.
You've probably heard the popular advice already. Pick a price per square foot, multiply, add a little cushion, and you're done. That's tidy, confident, and exactly how homeowners get ambushed by foundation work, permit questions, and an electrical panel that's already full. The headline number is usually the least reliable part of the estimate. The useful part is everything the calculator left outside it.
How a Room Addition Cost Calculator Works
A room addition cost calculator converts floor area into a preliminary construction budget. It doesn't price your addition in the way a contractor prices a defined scope on your lot. Think of it as a napkin with better formatting. Its job is to give you a defensible starting range so you can ask smarter questions, not to predict the final invoice to the dollar.
That range needs a baseline, and baselines work best when they're tied to something real. The National Association of Home Builders 2024 construction cost survey reported an average construction cost of $428,215 for a typical 2,647-square-foot single-family home, or approximately $162 per square foot, the highest figure recorded in that survey series. That's a national whole-house figure, not a California addition price. Still, it gives the calculator a documented anchor instead of a number pulled from a neighbor's barbecue conversation.
The Mechanical Math Comes First
The opening calculation is simple multiplication. At $162 per square foot, 200 square feet produces $32,400, and 400 square feet produces $64,800. A calculator may then adjust that result for room type, finish level, region, structure, and utilities. The multiplication is objective. The adjustments are where judgment, missing information, and optimism start arguing with each other.
A calculator output is a hypothesis about scope. If the scope hasn't been checked against the house and the lot, the precision is mostly decoration.
An addition isn't a tiny new house dropped neatly beside the old one. It needs a structural connection to the existing building, a new foundation, and an exterior envelope that matches what you already have. It may also need utility extensions, design and engineering, permits, insulation, and interior finishes. Each item can revise the baseline, and some must be investigated before anyone can responsibly narrow the range.
Why a National Baseline Still Helps
You might wonder why you should use a national benchmark for a project in Orange County or Los Angeles. You shouldn't use it as your local answer. You use it to establish scale and method, then replace its assumptions with local labor, permitting, seismic requirements, site access, and your actual finish selections.
Read every calculator result with one question in mind. What did this tool assume, and what did it never ask? If it can't show its assumptions, treat the result as the beginning of a conversation. It's useful for deciding whether to keep exploring. It's not enough for signing a contract.
Key Inputs Every Calculator Should Request
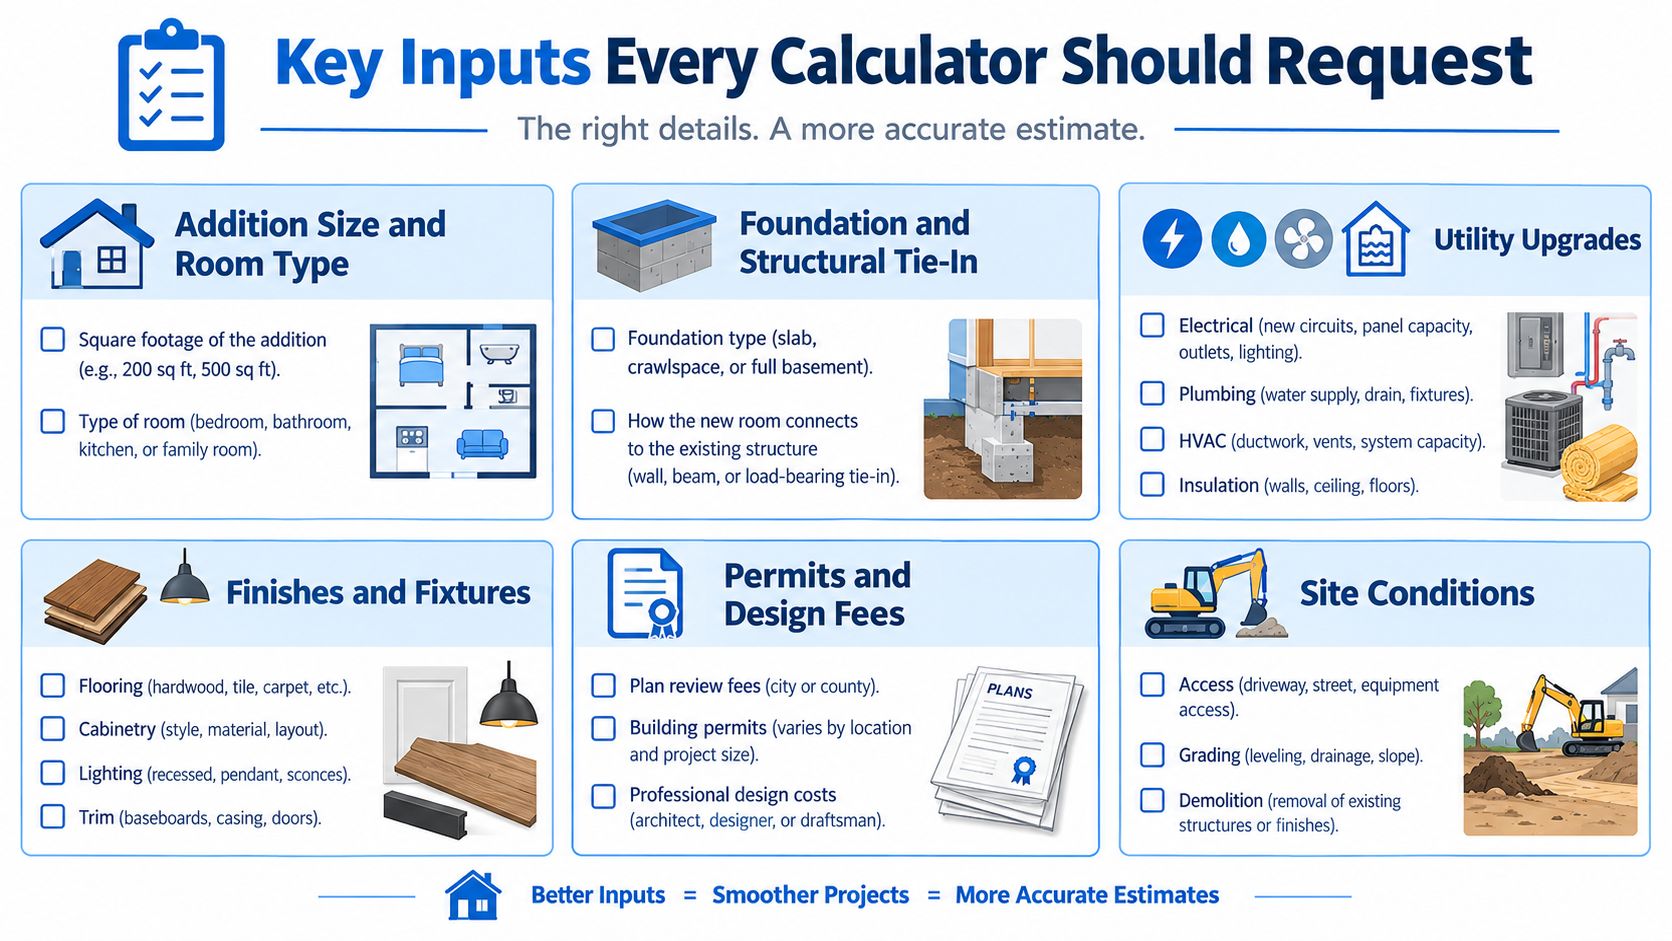
A calculator that asks only for square footage is answering an easier question than the one you brought to it. Square footage tells it how big the room is. It says almost nothing about what's inside the walls, under the floor, or waiting at the permit counter. A stronger room addition cost calculator requests enough detail to expose the expensive differences between two rooms with identical dimensions.
Size, Room Type, and Structural Connection
- Addition size and room type: State the floor area and whether you're building a bedroom, bathroom, kitchen, or family room. A dry room with outlets and lighting asks far less of your systems than a room with water, drainage, ventilation, and tile.
- Foundation conditions: Identify whether the design assumes a slab, crawlspace, or another foundation approach, and note slopes, access, or soil concerns. The calculator can't inspect the ground, but it should flag the foundation as an assumption rather than bury it in the rate.
- Structural tie-in points: Describe where the new room meets the existing house and whether walls or roof sections must open. That connection affects framing, weatherproofing, temporary support, and the sequence of work.
A bedroom and a bathroom can share the same footprint while demanding very different scopes. If the tool gives them nearly identical estimates, it isn't modeling the work. It's multiplying with confidence.
Utilities, Finishes, and Drawings
Plumbing distance matters because supply and drain lines need a practical route to existing systems. The farther the new wet room sits from those connections, the more the layout can complicate the work. HVAC load needs matter because added conditioned space may exceed what your current equipment can serve comfortably. Electrical-service capacity matters because new circuits are easy to draw and harder to support if the existing service is already stretched.
Finish level deserves its own input, not a vague choice between budget and luxury. Flooring, cabinetry, lighting, trim, doors, and fixtures can change the budget without changing the footprint by an inch. Exterior-material matching belongs there too, especially when roofing, stucco, siding, windows, or trim must blend with an older house. A discontinued profile can turn a routine selection into a small research project.
Finally, ask whether architectural and structural drawings are included. Some estimates assume you'll provide them. Others include design work in the total. If you don't know which one you're looking at, you can't compare it fairly with another estimate. Before you run the numbers, gather the room dimensions, intended use, known utility locations, finish preferences, photos of the connection area, and any existing plans. That's the difference between feeding a calculator data and feeding it wishes.
Separating Hard Costs From Soft Costs
One undifferentiated rate hides where the money goes. It also makes useful tradeoffs hard to see. If you lower the finish level, which part of the budget should move? If framing becomes more complex, which category absorbs it? A well-built room addition cost calculator separates construction into categories so you can adjust the right line instead of shaving the total and hoping nobody notices.
The NAHB category shares cited in the opening section show why that separation matters. Interior finishes form the largest share, followed by the major systems that run behind the walls. That order surprises homeowners who picture framing as the main event. Framing creates the room, but finishes and systems make it usable, comfortable, and expensive in ways that depend heavily on your choices.
| Cost Category | Share of Construction Cost |
|---|---|
| Interior finishes | 24.1% |
| Major-system rough-ins | 19.2% |
| Framing | 16.6% |
| Exterior finishes | 13.4% |
| Foundations | 10.5% |
| Site work | 7.6% |
| Final steps | 6.5% |
| Other costs | 2.1% |
What the Categories Help You Decide
Interior finishes respond directly to selections you control, including flooring, cabinetry, surfaces, fixtures, and trim. Major-system rough-ins cover plumbing, electrical, and HVAC work, so room type and utility distance influence that category before you've picked a single pretty sample. Foundations and site work respond to the lot and the chosen structure. Exterior finishes depend partly on taste and partly on how convincingly the new room must match the old one.
Those national shares shouldn't be pasted onto your project as fixed proportions. Use them as a diagnostic map. If an estimate seems low, ask which category is unusually light and why. If you're comparing a wet-room scope, the same discipline you'd use when reviewing a detailed bathroom remodel estimate breakdown applies here. Named categories are easier to challenge than one mysterious lump sum.
Hard Costs Are Not the Whole Project
Hard costs are the physical construction work represented by categories like foundations, framing, systems, and finishes. Soft costs support that work through design, structural engineering, zoning review, permits, and inspections. A calculator may include one group and exclude the other. Its headline can therefore look complete while missing costs you'll encounter before construction even starts.
Practical rule: Never compare two totals until you've confirmed that both include the same hard costs, soft costs, drawings, and exclusions.
Ask for the soft costs as a separately labeled allowance. That one formatting change prevents a common budgeting error. You'll know whether the estimate is funding only the room or also funding the professional work required to define and approve it.
Feasibility Checks That Change the Budget
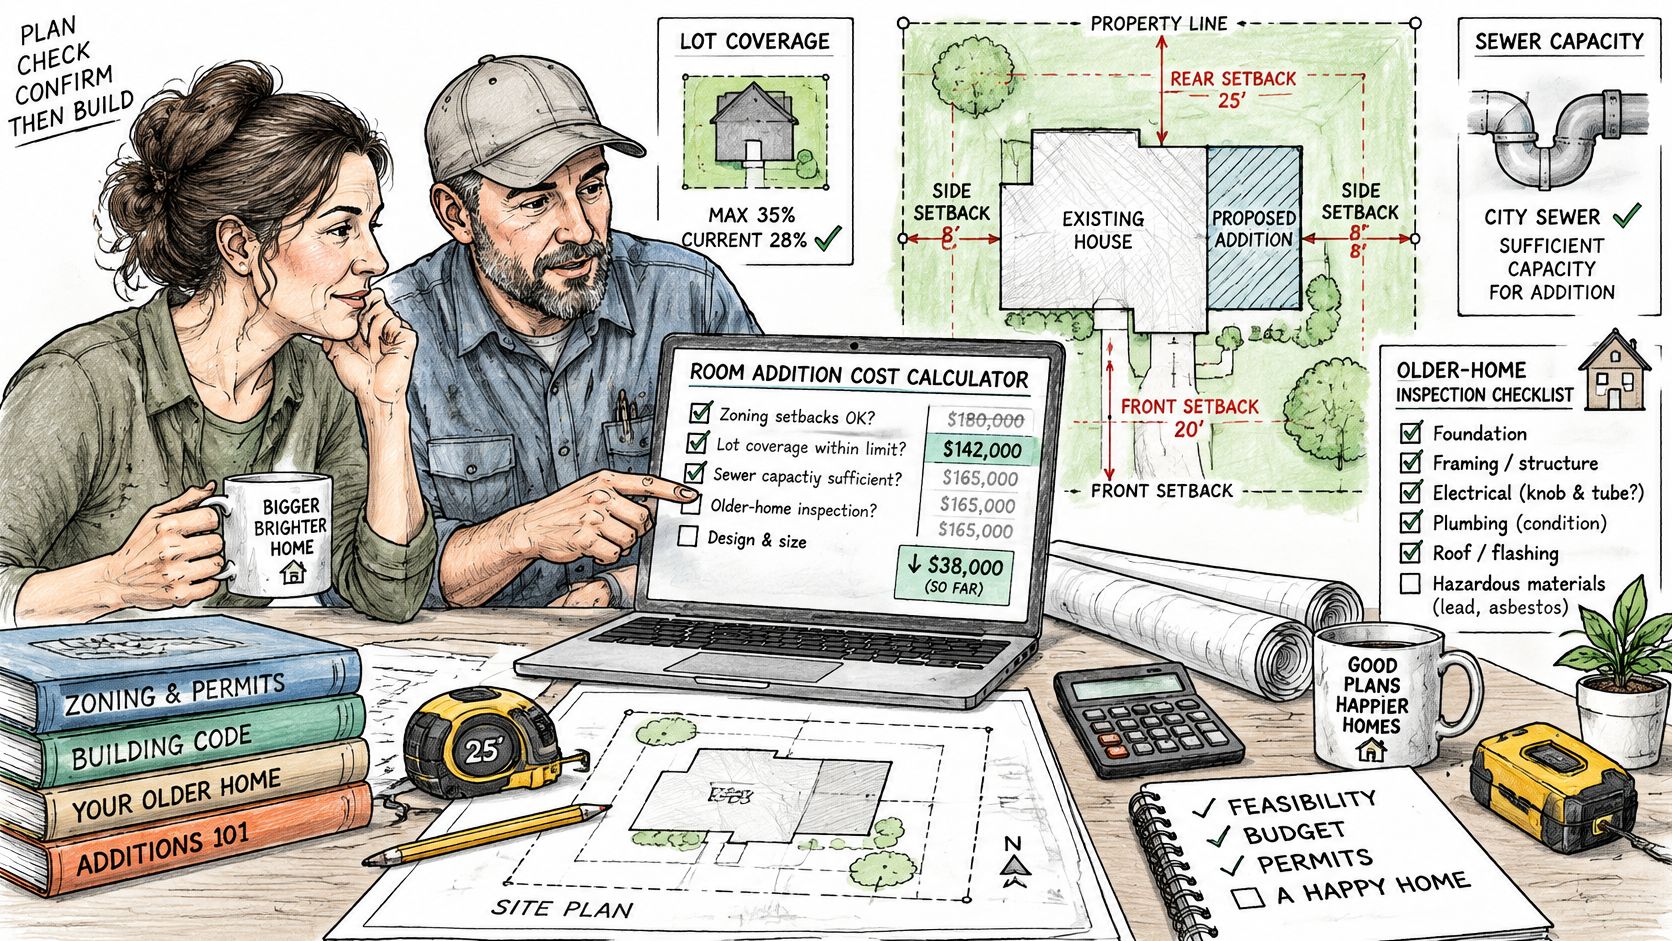
Here's the uncomfortable part. A room can be affordable on a spreadsheet and impossible on your lot. Zoning doesn't care that your calculator produced a lovely number. Neither does an undersized sewer connection or a structural condition hiding inside an older wall. Feasibility questions should come before price questions because they determine whether the room you priced is the room you're allowed, or able, to build.
The Gates That Can Shrink the Project
Setback compliance and lot coverage can reduce the buildable area before design begins. A calculator may price the full footprint you entered even when part of it crosses a limit. Sewer capacity, plumbing routes, and electrical service can also force changes that don't appear in a simple rate. Add foundation conditions, site access, seismic requirements, and exterior matching, and the supposedly standard addition becomes a site-specific puzzle.
Older homes add another layer. Opening a wall can reveal electrical, plumbing, or structural work that wasn't visible during the first walkthrough. The calculator didn't miss it because it's dishonest. It missed it because nobody gave it x-ray vision. That's why a lower per-square-foot estimate can be less useful than a higher one with explicit exclusions. The higher number at least tells you where its knowledge ends.
Price the Work Before Construction
Available estimates place design and permits at roughly 5 to 8% of project cost, while engineering alone may run about $2,000 to $5,000, according to current guidance on home addition cost per square foot. Treat those as planning allowances to verify, not universal fees. Their value is visibility. They remind you that drawings, calculations, reviews, and approvals need funding before the first footing is dug.
That visibility matters in major California markets, where reported addition costs vary substantially by city and project complexity. Homeowners researching Orange County home remodeling conditions and project planning should expect local permitting, labor, access, and seismic requirements to reshape any national baseline. Los Angeles projects face the same need for local validation, even when the room itself looks straightforward.
A credible room addition cost calculator should therefore begin with feasibility questions, not just dimensions. It should ask about setbacks, lot coverage, utilities, structure, drawings, and site constraints, then present a low, base, and high scenario. The preconstruction allowance should sit on its own line. That protects you from spending design money to discover, one expensive drawing later, that the original footprint was never workable.
Modeling Overruns and Timing Risk
Most calculators behave as if the estimate and the final cost are close relatives. Homeowners often discover they're more like distant cousins who met once at a wedding. The tool multiplies area by a static rate, adds a generic contingency, and stops just where the interesting financial questions begin. A better model asks what could make the estimate wrong.
A 2025 homeowner survey on renovation budget outcomes reported that 37% of respondents exceeded their original renovation budget. In that same survey, materials were cited by 58% and labor by 40% as leading overrun drivers, while unexpected repairs affected 20%. Those results don't predict your addition, but they do expose the weakness of presenting one precise number with no discussion of risk.
Separate Variability From Uncertainty
Some movement is foreseeable once the inputs are honest. Finish level, room type, structural tie-in, plumbing distance, HVAC needs, and local labor can be investigated and priced with greater confidence. Call that foreseeable variability. You may not like the resulting range, but you can narrow it through design decisions and site verification.
Other movement comes from uncertainty. Concealed conditions, permitting changes, material substitutions, and owner selections made after the estimate can all revise the scope. A calculator shouldn't pretend those risks are the same. It should identify which allowances cover choices you control and which contingency protects against conditions nobody has verified yet.
Timing Changes More Than the Start Date
A project that starts later may face different labor and material pricing. A project that runs longer can also increase temporary housing, storage, and financing costs. Those carrying costs rarely appear in a construction rate, yet they come out of the same household budget. If your schedule depends on permit timing, product availability, or moving out during part of the work, the calculator should let you test that timing instead of freezing the project in an imaginary present.
Contingency should appear as a range tied to documented assumptions. The estimate should also be updated at milestones: after feasibility checks, after drawings develop, and after major selections are locked. That's less satisfying than a single answer. It's also how real budgets stay connected to real projects. The question isn't just what your addition might cost today. It's which risks can be reduced before construction turns them into change orders.
Sample Calculations and Realistic Cost Ranges
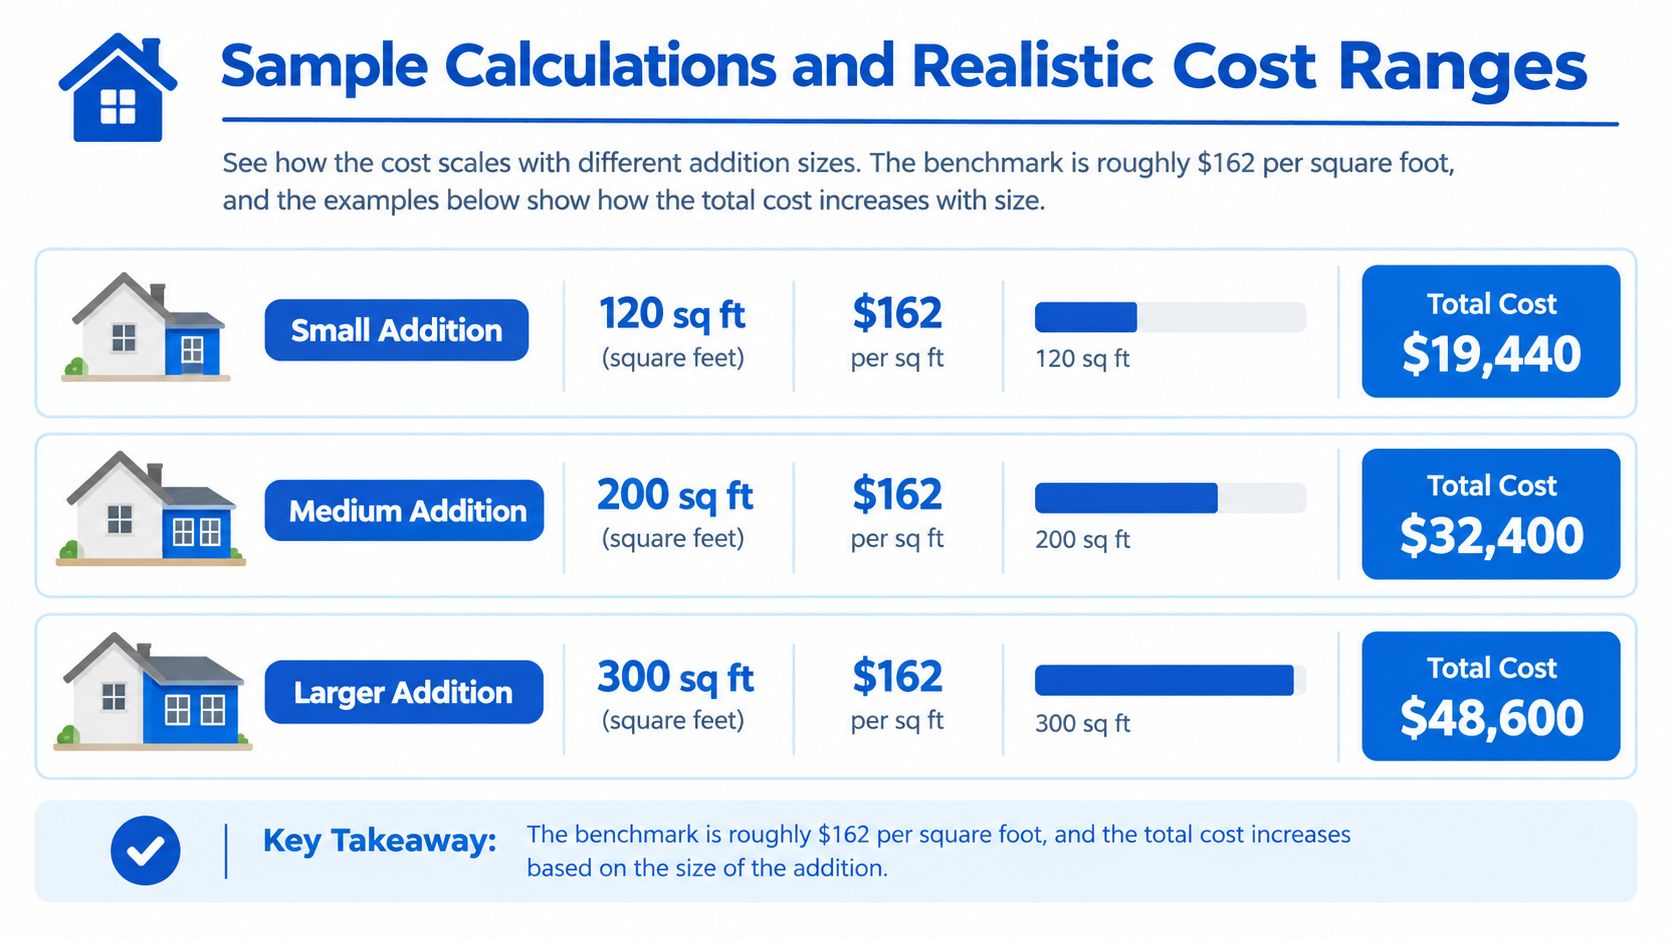
Let's put the calculator on the table and watch it work. The examples below use the same roughly $162 per square foot baseline introduced earlier. They illustrate a method you can reproduce with your own dimensions. They don't promise a local quote, and they deliberately leave the adjustment lines visible so you can see where a tidy baseline starts meeting an untidy house.
Three Baselines You Can Reproduce
- Small addition: 120 square feet multiplied by $162 equals $19,440.
- Medium addition: 200 square feet multiplied by $162 equals $32,400.
- Larger addition: 300 square feet multiplied by $162 equals $48,600.
- Family-room example: 400 square feet multiplied by $162 equals $64,800.
Notice what just happened. The math scaled perfectly because multiplication is obedient. Your house may not be. A 200-square-foot bedroom with a simple tie-in and no plumbing sits in a different risk position from a same-sized room that needs drainage, water supply, and more demanding finishes. If plumbing enters the scope, compare the assumptions with the same care you'd use when reviewing the cost to add a half bath, because wet-room work changes more than the fixture list.
Build Low, Base, and High Scenarios
Start with the baseline as your base construction starting point, not as the total. Add a separately labeled preconstruction allowance using the design, permit, and engineering planning figures discussed earlier. Then create a low scenario for a simpler verified scope, a base scenario for the scope you currently expect, and a high scenario for the credible complications you've identified but haven't priced precisely.
The low end should never mean ignoring known work. It means the feasibility checks pass, the tie-in is straightforward, existing systems can support the room, and selections stay within the stated finish level. The high end should capture items such as utility upgrades, difficult exterior matching, structural corrections, or concealed conditions that remain unresolved. Don't invent a dramatic number just to feel conservative. Name the reason each scenario moves.
Your personal version needs only four columns. Write the baseline, the preconstruction allowance, project-specific adjustments, and contingency as separate lines. Then note the assumption behind each one. When a contractor later gives you a different figure, you won't have to ask why the total changed in the abstract. You can point to the exact line where your scope, site, or finish assumption stopped matching reality.
Calculator Estimates Versus Design-Build Quotes
A calculator estimate and a design-build quote may both end in a dollar figure, but they aren't the same product. One is a self-guided model based on the information you entered. The other should be a contractor's response to a defined scope, site conditions, drawings, selections, and a construction sequence. Comparing only the totals is like comparing two restaurant bills without checking whether one dinner included drinks.
Scope clarity is the first difference. A room addition cost calculator usually assumes a standard room built under standard conditions. A design-build quote should describe the actual foundation, tie-in, systems, finishes, and exterior work. If it doesn't, it may be a calculator estimate wearing a nicer jacket.
Compare the Accountability, Not Just the Number
- Documented exclusions: Ask what's outside the price, including drawings, engineering, permits, utility upgrades, and finish allowances. A quote with explicit exclusions is easier to evaluate than a lower figure with silent gaps.
- Drawings and validation: Determine whether floor plans and structural drawings exist, who prepares them, and whether the price was checked against them. A documented scope can be validated before design and permitting costs accumulate.
- Schedule coordination: Ask who sequences design, approvals, trades, inspections, and material decisions. Overlaps don't manage themselves just because everyone involved is talented.
- Accountability: Identify who answers when the framing plan, electrical route, or HVAC layout conflicts in the field. One accountable team should own the coordination problem instead of handing it back to you.
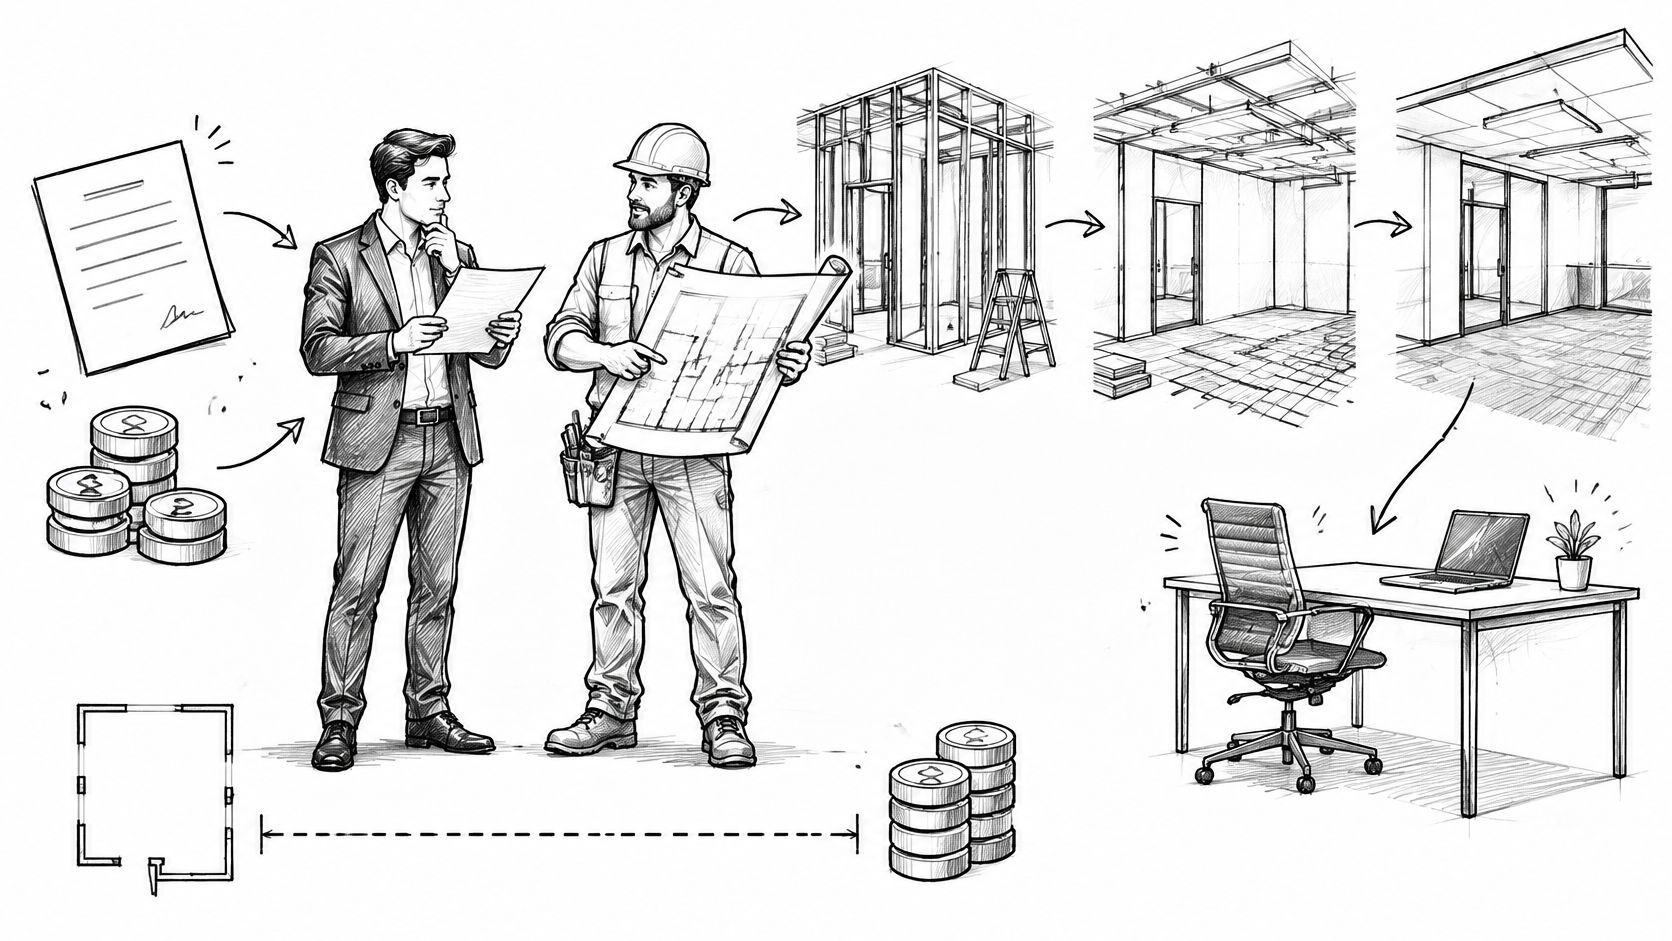
A design-build process typically carries a project from concept through construction under one coordinated workflow. Preconstruction planning may include floor plans, 3D renderings, detailed estimates, and selection guidance before work begins. Dedicated project management then follows the project from kickoff through completion, coordinating trades and keeping decisions attached to the documented scope.
That doesn't make every design-build quote automatically better. You still need to verify licensing, read the allowances, and ask how changes are priced. It does mean the strongest quote gives you more than numerical confidence. It gives you a scope you can inspect, exclusions you can price separately, and a team structure you can hold accountable when the existing house offers its first surprise.
Quick Reference Checklist and Your Next Step
Before you request another estimate, complete the checklist below in plain language. Don't worry about making it sound technical. A clear note that says the panel location is unknown is more useful than a confident blank space. You're building the information package that allows a calculator range to become a documented scope.
- Square footage and room type: Record the dimensions and intended use, including whether the room contains plumbing.
- Foundation and structural tie-ins: Note the assumed foundation, roof connection, wall openings, and any visible concerns.
- Utility capacity: Identify plumbing routes, HVAC needs, electrical-service questions, and sewer constraints.
- Finish level: List flooring, cabinetry, lighting, trim, fixtures, and exterior materials that must match the house.
- Drawings included: State whether architectural and structural drawings exist or still need to be prepared.
- Zoning and setback checks: Record lot coverage, setback limits, access limits, and any unresolved approval questions.
- Labeled contingency: Separate foreseeable adjustments from money held for concealed or unresolved conditions.
Turn the Checklist Into a Validated Scope
Review any item you marked as unknown. Those unknowns belong in the high scenario or in a preconstruction investigation, not in a footnote you'll meet again during demolition. The key inputs section can help you gather missing details, the cost category table can help you test where the budget concentrates, and the overrun discussion can help you decide which risks remain unresolved.
Bring the assumptions with the number. A range without its assumptions is just three guesses in a trench coat.
Your practical next step is an on-site consultation built around the completed checklist. Ask for a preconstruction review that tests feasibility, separates design, engineering, and permit allowances, and converts your calculator range into a written scope. That conversation should end with clearer exclusions, a realistic sequence, and a plan for updating the estimate as drawings and selections firm up. You'll still have a range, but it'll be a range with a paper trail. For a homeowner, that's the moment the room addition cost calculator has done its job.
Bring your completed checklist to Epic Remodeling, a licensed Orange County general contractor serving Los Angeles and Orange Counties under California license CSLB #1095347, for design-build planning that includes floor plans, 3D renderings, detailed estimates, and dedicated project management from kickoff through completion. Book an on-site consultation to test feasibility, separate your design, engineering, and permit allowances, and turn your calculator range into a documented room addition scope.